Jack Sparrow COMPLETE! New PHOTOS page 8.
+17
WakeJake
HyperShadow
pauliepoos
jacksadventures
Capt Jag
Pistol
Polynesian Pirate
1qsp
Captain McAnen
pinder91
Cap.cristianSparrow
Mojo Turbo
upnorthjack
Captain McCool
Capn_Jack_Savvy
capt.J.j.sparrow
Indy Magnoli
21 posters
Page 1 of 5
Page 1 of 5 • 1, 2, 3, 4, 5 
 Jack Sparrow COMPLETE! New PHOTOS page 8.
Some of you may know me from the RPF, Club Obi Wan, or just from my various props and costume pieces...
Well, I've come here on a quest: to complete a high quality Jack Sparrow costume by the 18th of February 2012. Our parish church and school are hosting a fundraising gala (fair) and I've offered several of my other costumes (namely Darth Vader, a Stormtrooper, and possible Boba Fett) to help attract people and to generally interact with people throughout the day. I thought Jack would make a great addition and (being a bit more practical an outfit) can help the helmeted guys get around more easily.
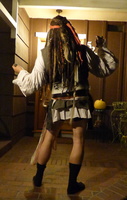
Now, I'm no newbie when it comes to rush building (some of you may know my "6 Star Wars Costumes in 3 Weeks w/ No Budget!" thread from the RPF) and I've even put together a couple of generic pirate costumes before in a pinch:

The only thing I really have are an MR compass and bananas (plenty of these, as I've been selling them for years through my clothiers site). Here is one brand new, one naturally aged by wear and exposure to sun, and a third which has been soaked in a little bleach:

The next thing I did was to start putting out feelers for who might have things to trade (part of my modus operani is trying to do high quality for little to no money, but doing a lot through trading)... and so far I've managed to get a sash, the rings, a baldric buckle and some embossed pleather to make the baldric (though I would prefer to use genuine leather). I've also got some breeches (they're blue, so I'll have to see if I can dye them to match Jack's).
I have a lot of leather laying around, so after doing some research, I made myself a palm glove after a little cutting and sewing:

I'm also doing a run of accurate swords and scabbards, so I should have those done before the date needed, so that's covered too.
So... that's my start. If you've got advice, would like to donate to the cause, or do some trading, shoot me a PM or e-mail.
I also want to add a big thanks to Mojo for his very instructive and helpful wiki... without which I wouldn't have gotten this far.
Kind regards,
Magnoli
Well, I've come here on a quest: to complete a high quality Jack Sparrow costume by the 18th of February 2012. Our parish church and school are hosting a fundraising gala (fair) and I've offered several of my other costumes (namely Darth Vader, a Stormtrooper, and possible Boba Fett) to help attract people and to generally interact with people throughout the day. I thought Jack would make a great addition and (being a bit more practical an outfit) can help the helmeted guys get around more easily.
Now, I'm no newbie when it comes to rush building (some of you may know my "6 Star Wars Costumes in 3 Weeks w/ No Budget!" thread from the RPF) and I've even put together a couple of generic pirate costumes before in a pinch:

The only thing I really have are an MR compass and bananas (plenty of these, as I've been selling them for years through my clothiers site). Here is one brand new, one naturally aged by wear and exposure to sun, and a third which has been soaked in a little bleach:

The next thing I did was to start putting out feelers for who might have things to trade (part of my modus operani is trying to do high quality for little to no money, but doing a lot through trading)... and so far I've managed to get a sash, the rings, a baldric buckle and some embossed pleather to make the baldric (though I would prefer to use genuine leather). I've also got some breeches (they're blue, so I'll have to see if I can dye them to match Jack's).
I have a lot of leather laying around, so after doing some research, I made myself a palm glove after a little cutting and sewing:

I'm also doing a run of accurate swords and scabbards, so I should have those done before the date needed, so that's covered too.
So... that's my start. If you've got advice, would like to donate to the cause, or do some trading, shoot me a PM or e-mail.
I also want to add a big thanks to Mojo for his very instructive and helpful wiki... without which I wouldn't have gotten this far.
Kind regards,
Magnoli
Last edited by Indy Magnoli on Sun Feb 17, 2013 2:28 pm; edited 2 times in total
 Re: Jack Sparrow COMPLETE! New PHOTOS page 8.
what jack are you looking to be? CotBP, DMC/AWE, OST? It all depends on what one.
 Re: Jack Sparrow COMPLETE! New PHOTOS page 8.
Mostly DMC/AWE, but I'm really not that picky.
You should see my mix-and-match Boba Fett... drives the SW guys nuts!
You should see my mix-and-match Boba Fett... drives the SW guys nuts!
 Re: Jack Sparrow COMPLETE! New PHOTOS page 8.
Indy Magnoli wrote:
The only thing I really have are an MR compass and bananas (plenty of these, as I've been selling them for years through my clothiers site).
Hmm bananas huh?

 Re: Jack Sparrow COMPLETE! New PHOTOS page 8.
Eh... Hmmm... well in Lego Pirates, the bananas are paramount to finishing most quests. So... yes, very important! 
 Re: Jack Sparrow COMPLETE! New PHOTOS page 8.
Bananas? That would be from Curse of the Black Pearl. I hope they are screen accurate. More like plantains....

Capn_Jack_Savvy- Pirate Lord

- Posts : 702
Location : Somewhere between Piracy and Fantasy
 Re: Jack Sparrow COMPLETE! New PHOTOS page 8.
Worked on the breeches... they started out a dark blue like this:

So, instead of buying dye remover (I'm all about cutting costs), I soaked them in about 2 cups of bleach and 8 cups of water for about five minutes. After rinsing them out and line-drying them... they now look like this:

I'm really amazed at how much better they look. Now I'm debating whether to darken them up with some brown dye or just leave them. I really like the worn-grey look they are now.

So, instead of buying dye remover (I'm all about cutting costs), I soaked them in about 2 cups of bleach and 8 cups of water for about five minutes. After rinsing them out and line-drying them... they now look like this:

I'm really amazed at how much better they look. Now I'm debating whether to darken them up with some brown dye or just leave them. I really like the worn-grey look they are now.
 Re: Jack Sparrow COMPLETE! New PHOTOS page 8.
Nicely done! I'd personally add some brown in there, but that's really about personal preference more than anything. There's still plenty of debate regarding just what color those gorram breeches are, heh.
 Re: Jack Sparrow COMPLETE! New PHOTOS page 8.
Yeah, I'll probably add some brown distressing and call it a day. The biggest problem is that pesky low rise, but with all the other layers, I guess that isn't a big deal. And the waist is a bit big, so I'll probably add another set of eyelets at the split V back and cinch it up that way.
 Re: Jack Sparrow COMPLETE! New PHOTOS page 8.
May I recommend a pair of these hidden under your waistcoat? 
I use them all the time! No more slippage or pirate crack!


I use them all the time! No more slippage or pirate crack!


Capn_Jack_Savvy- Pirate Lord

- Posts : 702
Location : Somewhere between Piracy and Fantasy
 Re: Jack Sparrow COMPLETE! New PHOTOS page 8.
Actually, I was thinking about using suspenders... I'll see how my extra eyelet idea works out first.
 Re: Jack Sparrow COMPLETE! New PHOTOS page 8.
Well... I just pulled the trigger on some Caboots (they were VERY helpful with communication) and should have a Yordreem wig set on its way next week. So... that's

and

covered.

and

covered.

 Re: Jack Sparrow COMPLETE! New PHOTOS page 8.
I need to get a pair of chocolate caboots. Can't wait to see your suit!
 Re: Jack Sparrow COMPLETE! New PHOTOS page 8.
I ordered the more expensive pair at 21" tall. Fingers crossed, but so far communication has been good, so I'm hopeful!
 Re: Jack Sparrow COMPLETE! New PHOTOS page 8.
Good call on the 21 inch shafts, thats the way to go.

upnorthjack- Rascal
- Posts : 24
 Re: Jack Sparrow COMPLETE! New PHOTOS page 8.
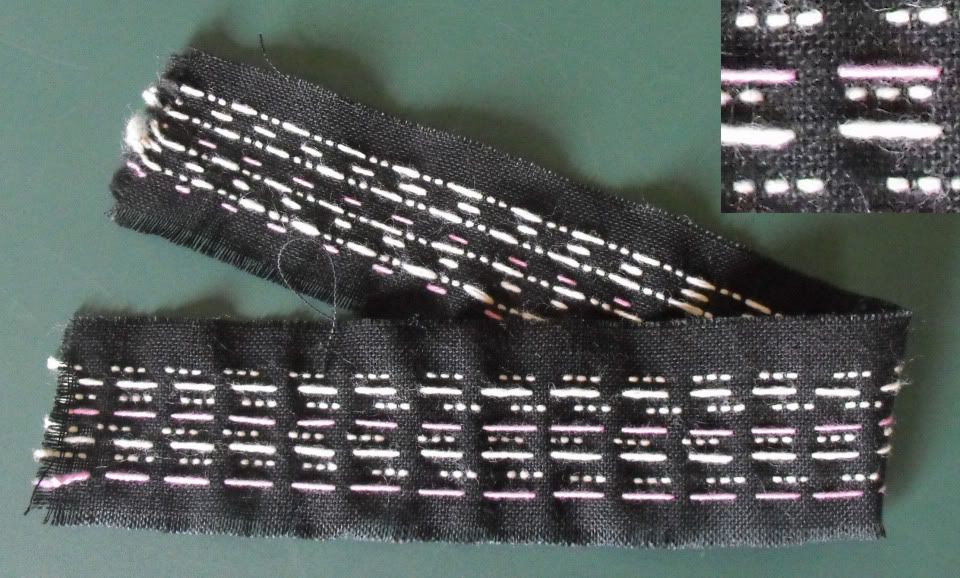
Next up... the wrist strap. I picked up 50 cents worth of black burlap from a local cloth shop and, using the yarn I had on hand and my daughter's darning needle, we set to weaving. My daughter (11 years old) did about half the work, but then I got impatient and finished it up myself. We only had a pink and off-white yard, but it worked well enough:

Once the needlework was done, I added four vertical rows of stitching add strength and two long horizontal stitching (above and below the yard) to prevent fraying past those points.
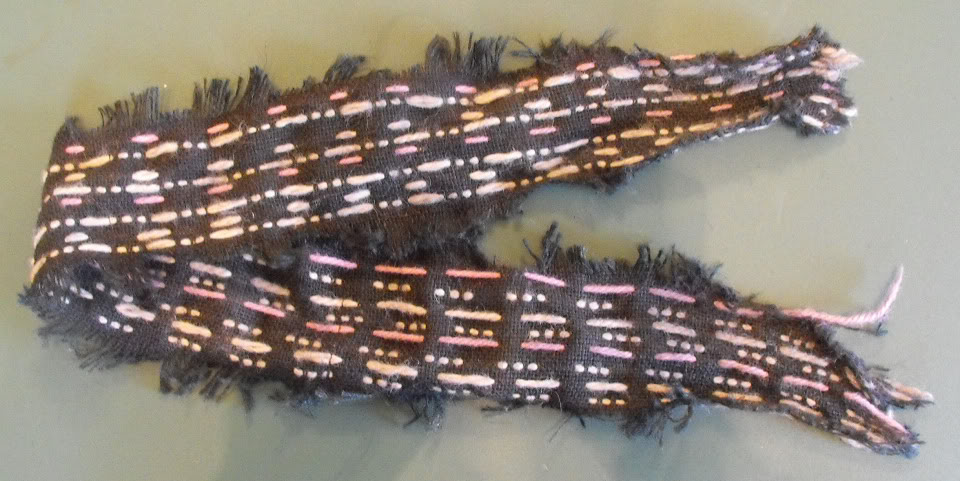
I then sprayed the entire cloth with a strong, black coffee mixture (the same I use for aging my document props):

Lastly, I set to fraying the edges. Once that was done, I used black shoe polish to darken the yard further, especially the parts that would tie at the ends. I also added a little baby powder to give the black parts a dustier look. Unfortunately, most of this doesn't show up in the photo, but this will give you an idea of the final product:

I'm pretty happy for 50 cents.

Once the needlework was done, I added four vertical rows of stitching add strength and two long horizontal stitching (above and below the yard) to prevent fraying past those points.
I then sprayed the entire cloth with a strong, black coffee mixture (the same I use for aging my document props):

Lastly, I set to fraying the edges. Once that was done, I used black shoe polish to darken the yard further, especially the parts that would tie at the ends. I also added a little baby powder to give the black parts a dustier look. Unfortunately, most of this doesn't show up in the photo, but this will give you an idea of the final product:

I'm pretty happy for 50 cents.
 Re: Jack Sparrow COMPLETE! New PHOTOS page 8.
I've had the MR skull ring for years and recently acquired the other three MR rings through a trade. Luckily, both the Dragon Ring and Stolen Ring fit me perfectly on the correct fingers. The Flower Ring is a little loose (no biggie there) but the Skull Ring was about a full size too small to fit on my right forefinger.
So, I decided to try resizing this myself. I bought a cheap stainless steel ring from the dollar store:

This ring was a bit wider than the Skull ring, so I ground it down to an appropriate width and then, with apprehension, cut the back of the Skull ring:

The next thing I did was taper the edges of the skull ring cut ends. I cut the steel ring and tapered those ends as well. All of this was done so far using a table wheel grinder and dremel (but it could have easily all been done with just a dremel):

Next, I test the fit of the extending piece:

I was impatient so, instead of using a two-part epoxy (which would make sense for strength and durability), I super-glued the two pieces together. Again impatiently, I began sanding the joints... but the super glue didn't hold. So, like a madman, I just super-glued it again, this time being more careful with the sanding. I also used the super glue like a filler where the seams didn't quite mesh perfectly. After some more dremel work and then hand sanding, I arrived at the final product:


A $1 ring and elbow grease goes a long way.
So, I decided to try resizing this myself. I bought a cheap stainless steel ring from the dollar store:

This ring was a bit wider than the Skull ring, so I ground it down to an appropriate width and then, with apprehension, cut the back of the Skull ring:

The next thing I did was taper the edges of the skull ring cut ends. I cut the steel ring and tapered those ends as well. All of this was done so far using a table wheel grinder and dremel (but it could have easily all been done with just a dremel):

Next, I test the fit of the extending piece:

I was impatient so, instead of using a two-part epoxy (which would make sense for strength and durability), I super-glued the two pieces together. Again impatiently, I began sanding the joints... but the super glue didn't hold. So, like a madman, I just super-glued it again, this time being more careful with the sanding.


A $1 ring and elbow grease goes a long way.
 Re: Jack Sparrow COMPLETE! New PHOTOS page 8.
Just got confirmation from Caboots that the boots are on their way! Great communication and fast service (so far), so if the boots are what they're supposed to be, I'll be very happy with these guys.
For the waistcoat, I've decided to have my tailors give this a go. If this is successful, I'll be adding this to my site which will allow anyone to order these with a HUGE selection of fabric and color options. I'm going for a silk/linen blend in dark pewter for the front and a wool blend in silver with salmon pinstripe for the back:


Lastly... my first "finished" part of the costume... Jack hands:

Kind regards,
Magnoli
For the waistcoat, I've decided to have my tailors give this a go. If this is successful, I'll be adding this to my site which will allow anyone to order these with a HUGE selection of fabric and color options. I'm going for a silk/linen blend in dark pewter for the front and a wool blend in silver with salmon pinstripe for the back:


Lastly... my first "finished" part of the costume... Jack hands:

Kind regards,
Magnoli
 Re: Jack Sparrow COMPLETE! New PHOTOS page 8.
indy..i may have some stuff for you... add me on facebook
ta
ta
 Re: Jack Sparrow COMPLETE! New PHOTOS page 8.
Got my Caboots yesterday! That's two and a half weeks from order to arrival... I'm impressed! They seem perfect to be (though I'm no Sparrow expert... yet). One of the boots is quite tricky to get on (due to a well fitting ankle area). I've started distressing the left boot with some Pecard leather dressing:

The 21" height is definitely the way to go, but the bells look a little longer proportionately (I could be wrong) so I rolled them up an inch or so, which will give me extra height to add the wrinkles around the ankles. Here's a shot of the toe for those wondering about the current accuracy of the toe shape:

Kind regards,
Magnoli

The 21" height is definitely the way to go, but the bells look a little longer proportionately (I could be wrong) so I rolled them up an inch or so, which will give me extra height to add the wrinkles around the ankles. Here's a shot of the toe for those wondering about the current accuracy of the toe shape:

Kind regards,
Magnoli
Page 1 of 5 • 1, 2, 3, 4, 5 
 Similar topics
» FleetStreetNightmare's Captain Jack Sparrow Photos
» MWE&d ADVENTURES OF CAPTAIN JACK - My Exclusive Sashes From Turkey!
» MWE&D Adventures of Captain Jack: ACME RINGS SET COMPLETE **FINALLY**
» Irish Captain Jack Sparrow
» Jack Sparrow Goes Camp - SPOOF
» MWE&d ADVENTURES OF CAPTAIN JACK - My Exclusive Sashes From Turkey!
» MWE&D Adventures of Captain Jack: ACME RINGS SET COMPLETE **FINALLY**
» Irish Captain Jack Sparrow
» Jack Sparrow Goes Camp - SPOOF
Page 1 of 5
Permissions in this forum:
You cannot reply to topics in this forum


